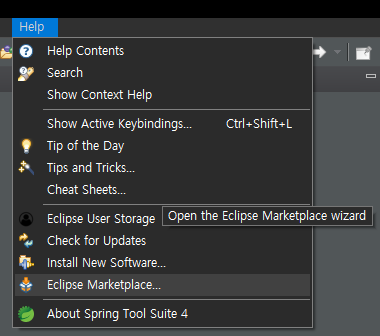
1. Help > Eclipse Marketplace

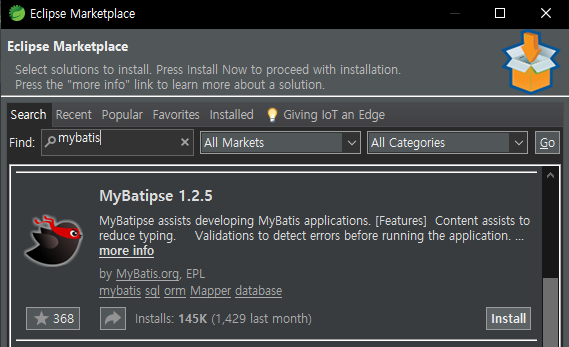
2. web 개발에 필요한 기능 다운받기
1) jsp 설치

2) mybatis 설치


3. sql 연결하기
1) Window > Show View > Console

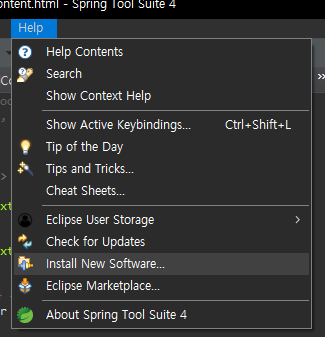
2) Help > Install New Software

3) http://download.eclipse.org/releases/neon 검색하기

3) Database Development 체크 > Next

4) 2개 항목이 나왔다면 Finish

5) Window > Show View > Other > Data Source Explorer 추가하기

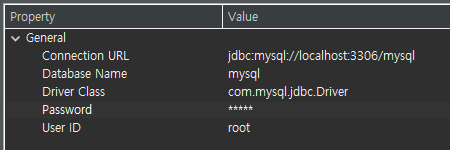
6) DB와 연결하기

- Name/Type : MySQL 5.1 선택

- JAR List > 기존꺼 Remove JAR/Zip > ** 다운받은 jar 추가하기

- Properties > Database를 mysql로 변경하기 > pw : 12345

- 성공!!

** Maven Repository > mysql connector > 8.0.30 > jar 파일 다운받기

4. tomcat 연결하기
5. 인코딩 맞추기

1) Window > Preferences > General > Workspace > Text file encoding > "UTF-8"

2) Window > Preferences > Web > CSS Files, HTML Files, JSP Files > Encoding > "UTF-8"

3) Window > Preferences > XML > XML Files > Encoding > "UTF-8"

6. 프로젝트 열기

1) 프로젝트 생성시 기본적인 파일 설치 하고 가기
(Lombok, Spring Web, Thymeleaf)

'Spring' 카테고리의 다른 글
| Spring_스프링_페이지 이동 (0) | 2022.09.06 |
|---|---|
| Spring_스프링 프레임워크 설치 (0) | 2022.09.02 |
| spring_복습 (0) | 2022.08.18 |